
The floor in your living room has started looking a bit shoddy. You feel a bit embarrassed when guests
drop by. Yes, it’s time you replaced the floor. Once you’ve decided to replace the floor, what should
concern you is how you should remove the floor tiles. You see floors with tiles in almost every home in
the United States.
The usual hammer and chisel may not be enough to remove the tiles and prying them off, more often
than not is a challenging task. The million-dollar question is, what should you be doing in such instances?
Read on as we share with you a few handy tips on floor removal that make the job much more efficient.
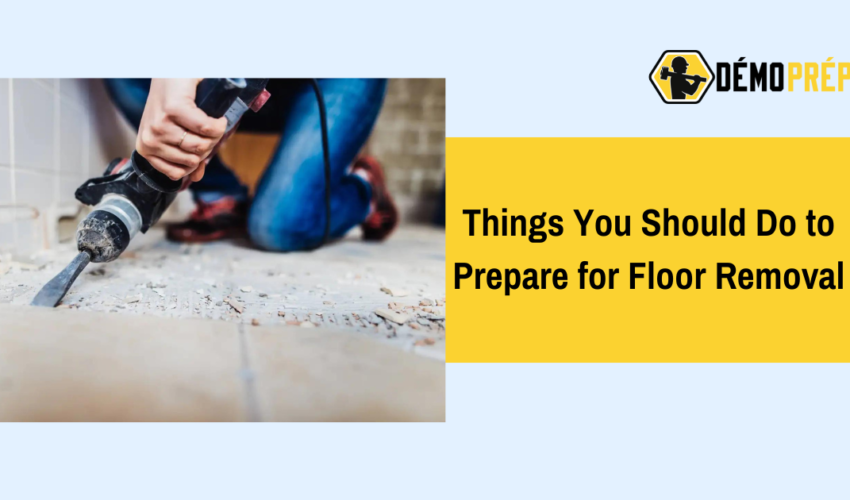
1. Get the Necessary Tools
You’ll need power tools to remove tiles sticking to the underlayment stubbornly. The rest of them shall
need manual tools to be pried off. Here’s a list of tools that you should have before you get started with
the floor removal job.
1 Wide or cold chisel
2 Pry bar
3 Square tipped spade
4 A drill that has a tile drill or diamond drill bit
5 High powered vacuum
6 Scraper for the floor or mortar
7 Masonry hammer
A tile drill bit shall help you bore holes deeper into very tough tiles. Drilling these holes makes breaking
through the tile as well as the grout much easier. A diamond drill is a better option for ceramic tiles
since they are very, very strong.
Get yourself a putty knife and a utility knife that come with many blades if you’re planning to recycle
trim work. With these tools, you can remove the trim work with much lesser chances of damage. Wrap
your furniture with plastic and keep your dustpan and broom ready. For faster tile removal and cleanup,
you must gather all these tools in one place.
2. Keep Your Home Ready for a Royal Mess
To make sure that your home isn’t covered with dust and debris, you should be serious about this step.
Most homes in the U.S. contain a lot of stuff and cleaning all of it after the project would be a
humongous task.
You can avoid dust settling on them by covering your furniture with plastic wrap or tarpaulin. You’ll have
to prevent dust from getting into the air conditioning by covering that as well. Cover the vents in the
room you’ll be working in if you have central air conditioning or ducts.
3. Put on Protective Clothing and Gear
A lot of workers in the U.S. get injured which keeps them away from work for days. Cuts, lacerations,
and punctures are the usual injuries. Most of the injuries can be prevented if the workers wear
protective gear. This makes having the right protective gear vital for your floor removal project.
While removing the floor, you’ll be working with cutting and drilling machines and there will be a lot of
dust when you are prying off the tiles. Therefore, before you start, you must put on a pair of goggles and
a face mask. With gloves, you can protect your hands and get a better grip on the tools. Footwear that
helps resist puncture, slip, and abrasion is very important as well.
5. Start Drilling
After attaching the tile or diamond drill bit, you’re ready for drilling. You’ve got to position the drill
making sure that the tip touches the grout line while holding the machine at an angle of 45 degrees. For
more comfort, you may need to adjust the position. Getting a firm grip before switching on the drill is
important. Now, you’ll have to get started with chipping through the grout while holding the machine steadily.
Keep chipping towards the tile’s underside till it’s broken. Make your way to the sides of the floor after
starting from the center. This way, continue drilling until all the tiles are chipped off.
6. Use a Hammer to Break the Other Tiles
Manual tiling tools like a masonry hammer are still used by most tillers worth their salt. No matter how
powerful the drill, some parts of the tiles just refuse to come off. With a masonry hammer, these
portions can be broken down into small pieces. To pry up the remaining parts of the tiles that have
cracked and yet remain attached, use a wide or cold chisel.
7. Collect the Broken Tiles
You will need a square-tipped spade to collect all the debris into a garbage bag after all the tiles are
removed. A broom and a dustpan will do a good job of sweeping up the bits of tile and grout that still
remain. You can remove all the debris with a wheelbarrow making just a few trips.
8. Remove the Mortar
To make sure that there are no bumps that leave the surface of the new floor uneven, you must remove
even the last bit of mortar. A single mortar layer scraper can remove the mortar in tiled floors with a
thin set as the bonding agent. For a smooth surface use both tools for mortar scraping. Harder-to-
remove mortar will need a masonry hammer for being smashed up. A scraper helps get rid of the
remaining smaller pieces.
9. Underlayment Removal
The underlayment part of the floor may have already deteriorated. It happens when the mortar just
won’t go away. Removing this part gives you a more stable floor. Remove all the screws that attach the
underlayment to the subfloor. You can prop up the edges and remove all of them with a flat shovel.
10. Subfloor Cleaning
To remove the remaining adhesive, use a square-tipped shovel and scraper. A chisel and hammer do a
good job of removing the smaller adhesive bits. With a broom and dustpan, clean up the debris. With a
high-powered vacuum, all traces of dust can be removed leaving the subfloor very smooth.
Conclusion
Our guideline helps you remove even the most stubborn of floors without breaking a sweat. Just get the
right tools and use them wisely. A little bit of careful planning is also required before you get going. We
have dealt with every floor removal aspect. You are a pro now!